
Understanding the 3D Laser Scanning Workflow: A Beginner’s Guide
- absolute3dau
- 3 days ago
- 7 min read
In today’s technology-driven world, industries are constantly looking for ways to improve accuracy, efficiency, and productivity. One such technology that has gained significant attention in recent years is 3D laser scanning. This advanced technique has become a vital tool in fields like engineering, construction, manufacturing, architecture, and even healthcare.
This beginner’s guide will walk you through the entire 3D laser scanning workflow, explaining each step in simple terms. Whether you're completely new to the concept or just curious about how it works, this article will help you understand the process and its practical benefits.
What Is 3D Laser Scanning?
3D laser scanning is a highly advanced, non-contact, and non-destructive method used to accurately capture the shape, size, and surface details of physical objects or environments. It works by projecting laser beams onto the surface of an object and measuring the time it takes for the light to bounce back. This process records thousands or even millions of tiny points, each with its own precise location in space. These points come together to form a dense and detailed digital map known as a point cloud.
This point cloud is then used to create an accurate 3D digital model of the scanned object. These models can include not just geometric data but also texture and color if needed. 3D laser scanning is used in a wide variety of industries and applications, including reverse engineering, product development, inspection, quality control, construction, archaeology, design modifications, virtual simulation, and historical preservation. Whether you need to recreate a missing part, analyze wear and tear, or plan a complex renovation, this technology makes the process easier, faster, and more reliable.
Why Is 3D Laser Scanning Important?
The importance of 3D laser scanning stems from its unmatched combination of speed, accuracy, and flexibility. Traditional measuring tools such as rulers, calipers, or manual tape measures are not only time-consuming but also prone to human error. These methods may work for simple objects but fall short when dealing with complex surfaces, irregular shapes, or large environments.
With 3D laser scanning, professionals can capture highly detailed data in a fraction of the time, leading to better decision-making and project outcomes. It’s especially useful in industries where precision and detail are non-negotiable, such as aerospace, automotive manufacturing, civil engineering, and medical design.
Some of the key benefits of 3D laser scanning include:
Time-saving: It drastically reduces the time needed for measurements and modeling, allowing projects to move forward faster.
High accuracy: Millions of data points can be captured with sub-millimeter precision, ensuring an exact digital representation.
Cost-effective: Reduces the risk of costly errors, miscalculations, and rework by providing precise data upfront.
Detailed documentation: Generates a digital record that can be archived, shared, or reused for future design or inspection tasks.
Enhanced safety: Scanning can be done from a safe distance, making it ideal for hazardous or hard-to-reach areas like tall structures or unstable sites.
Versatility: It can be used across a broad range of industries, from mechanical design and construction to healthcare and entertainment.
In short, 3D laser scanning is revolutionizing how physical spaces and objects are captured, analyzed, and replicated—making it a cornerstone technology for modern design and engineering projects.
The 3D Laser Scanning Workflow – Step by Step
To understand the full workflow, let’s break down each stage of the 3D laser scanning process. Every project may have unique requirements, but the core workflow typically includes the following steps:
1. Project Planning and Preparation
Before the actual scanning begins, proper planning is essential. During this phase, the scanning team works closely with the client to understand the project's scope, objectives, and expected outcomes.
Key questions that are answered during planning include:
What is the object or environment to be scanned?
What level of accuracy is required?
What type of scanner is most suitable?
What file formats are needed for the output?
Are there any safety or accessibility concerns?
Site inspections may also be done during this phase to assess environmental factors such as lighting, obstacles, or weather conditions if the scan is to be performed outdoors.
2. Setting Up the 3D Laser Scanner
Once the planning is complete, the scanner is set up at the location. A 3D laser scanner is typically mounted on a tripod to provide a stable base. Most scanners are portable and can be moved easily around a worksite.
During setup:
The scanner is leveled and calibrated.
Scanning parameters like resolution and range are configured.
Reflective targets or markers may be placed around the object or site for alignment purposes.
Scanners can be stationary or handheld. Stationary scanners are ideal for scanning large areas, while handheld scanners are better suited for small, detailed objects.
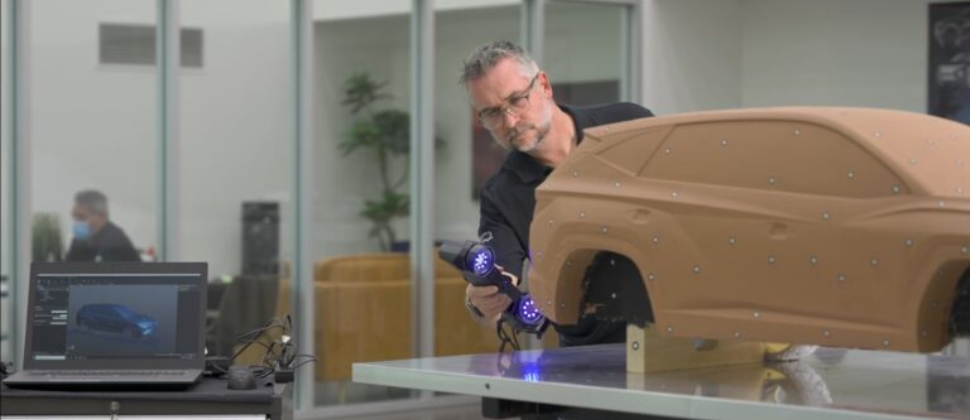
3. Data Acquisition (Scanning Process)
This is the core phase where the actual scanning takes place. The scanner emits laser beams that bounce off the surface of the object. By measuring the time it takes for the laser to return, the scanner calculates the distance and position of each point.
The scanner collects millions of such points in a matter of minutes, resulting in what is called a point cloud. This cloud is a digital representation of the object’s geometry and can contain color and texture information if the scanner includes a built-in camera.
If the object is large or complex, multiple scans may be taken from different angles to cover blind spots. These scans will later be merged during the processing phase.
4. Data Registration and Alignment
After data collection, the next step is registration—this is the process of combining multiple scans into a single, cohesive model. The software aligns the point clouds using common reference points or markers placed earlier.
Manual adjustments may be required if the automatic registration is not perfect. Accuracy at this stage is crucial to ensure the model reflects real-world dimensions.
Once aligned, the complete point cloud is ready for further processing.
5. Noise Removal and Cleaning
Raw point clouds often contain extra data or “noise” that doesn’t belong to the scanned object. This can include people walking by, unwanted reflections, or background elements.
The data is cleaned using specialized software tools that allow the technician to:
Remove unwanted data points
Fill small gaps
Smooth out irregularities
Trim the dataset to focus only on relevant areas
The result is a cleaner, more refined digital model.
6. Surface Reconstruction (Meshing)
After cleaning, the next step is converting the point cloud into a 3D mesh or surface. A mesh is made up of tiny triangles that connect the points and form the outer surface of the model.
This phase includes:
Meshing: Turning the point cloud into a triangulated model.
Smoothing: Reducing sharp edges or spikes.
Decimation: Lowering the file size while keeping detail intact.
Depending on the purpose, the mesh can be further refined into a CAD model for use in engineering, design, or manufacturing applications.
7. 3D Modeling and Exporting
In many projects, the mesh is just a starting point. Engineers and designers use the scanned data to create parametric models in CAD software like SolidWorks, AutoCAD, or Fusion 360.
This modeling process allows for:
Design modifications
Functional simulations
Tolerance checks
Reverse engineering
Once the model is finalized, it is exported in the desired format—such as STL, OBJ, STEP, or IGES—depending on how it will be used.
8. Inspection and Quality Control
Sometimes, the goal of 3D laser scanning is to compare a manufactured part against its original design to ensure it meets required specifications. This process is known as 3D inspection.
By overlaying the scanned model onto the original CAD model, technicians can identify deviations, warping, or other issues. This ensures the part is within tolerance and helps maintain quality standards in production.
9. Delivery and Final Reporting
The last step in the workflow is delivering the final files and documentation to the client. Depending on the project's needs, this may include:
3D models in various formats
Point cloud data
Inspection reports
Visual renderings
Digital archives for future reference
Clients may also receive training on how to view or use the files if they are new to 3D modeling software.
Common Uses of 3D Laser Scanning
Now that you understand the workflow, it’s helpful to see how this technology is applied in real-world situations:
Architecture: Scanning buildings for renovation, remodeling, or historical preservation. It captures precise measurements of existing structures, which are essential for accurate planning and design.
Engineering: Creating CAD models for old, complex, or undocumented parts. Engineers can redesign, analyze, or recreate components with improved performance and functionality.
Construction: Verifying installations, comparing construction progress to original design plans, and detecting deviations early. It helps maintain quality control and avoid costly rework.
Manufacturing: Checking dimensional accuracy of components during production. This ensures parts meet tight tolerances, improving product consistency and reducing waste.
Healthcare: Designing custom prosthetics, orthotics, and dental devices. 3D scanning allows for better patient comfort and more accurate fit by capturing body-specific shapes.
Film & Gaming: Creating realistic 3D assets for animations, visual effects, and virtual environments. It allows developers to build immersive experiences based on real-world textures and geometry.
Additionally, 3D laser scanning is being used in forensics, mining, archaeology, and aerospace, proving its versatility across many industries.
Final Thoughts
3D laser scanning may sound complex at first, but once the basic workflow is understood, it becomes a powerful and accessible tool for anyone working with physical spaces, objects, or components. From capturing intricate details to speeding up design and inspection processes, its benefits are hard to ignore. Whether it’s used for 3D inspection, modeling, renovation, or manufacturing, this technology is helping businesses of all sizes work smarter, faster, and with greater confidence.
As industries across architecture, engineering, construction, healthcare, and entertainment continue to embrace digital transformation, the demand for 3D laser scanning and its related services will only increase. The ability to create accurate digital twins, reduce errors, and improve efficiency is becoming essential in today’s competitive landscape.
For beginners, taking the time to understand how 3D laser scanning works is the first step toward unlocking new opportunities. It opens the door to more precise workflows, innovative design solutions, and higher productivity across every stage of a project. As the technology continues to evolve, those who embrace it early will be better equipped to stay ahead in a rapidly changing world.
Comments